Equipping the Maus
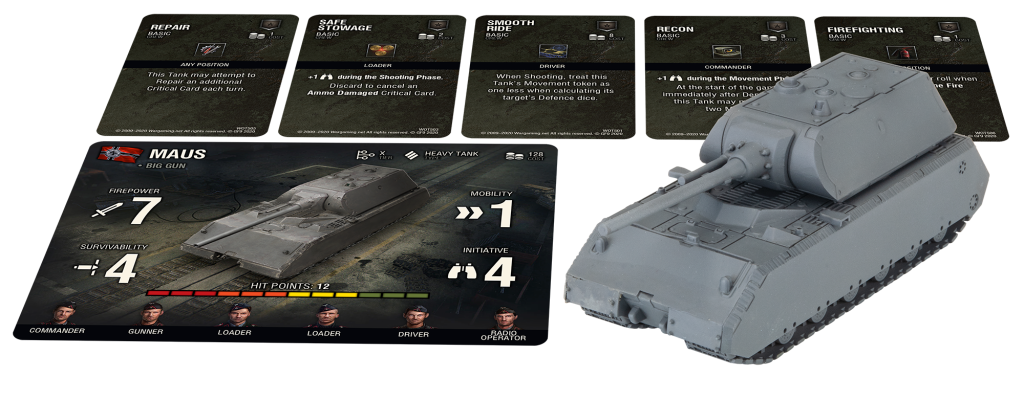 The Maus is a statement piece on the battlefield. With enormous firepower and a massive slab of Hit Points, removing this threat from the battlefield will be the priority for players who come up against it. Even though the Maus comes in at 128 points, we still have a little bit of wiggle room to add a few upgrades and crew to make sure we’re maximising its potential and ensuring that it is making the most of its awesome 7 Firepower every turn.
Using the Stationary shooting reroll will be paramount to maximising the damage output of the Maus. To do this, you’ll want to be able to maneuver the Maus to a dominant position early, where it has great lines of sight across the majority of the table. With a Mobility of 1, this could take a while and potentially leave your Maus stranded and of no use while the rest of your platoon is whittled down. Taking Recon is a great solution to this problem. For 3 points, your Maus can make up to two Moves immediately after deploying, letting you quickly advance to a position of dominance.
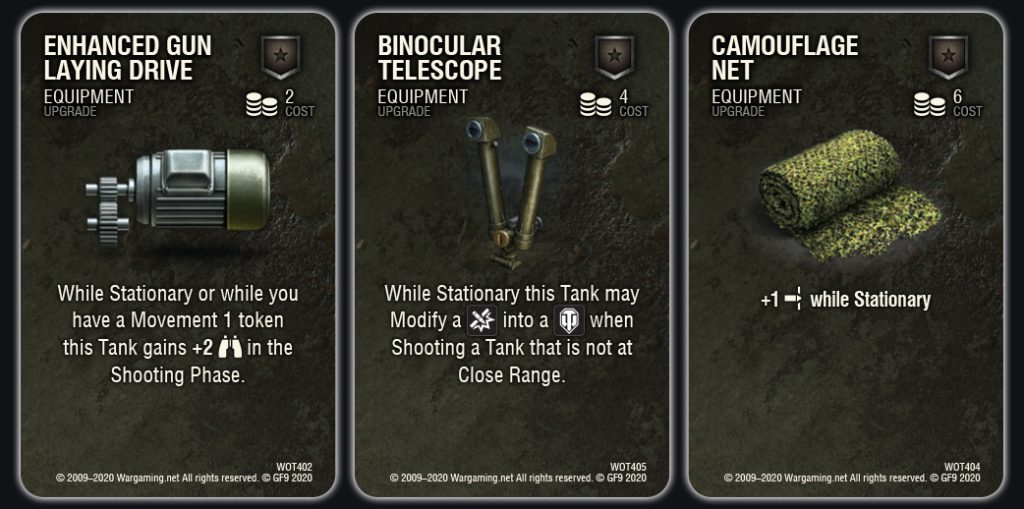
There are a number of cards that come with the 2023 Starter Set that enhance tanks that remain Stationary, which works well with our playstyle. Enhanced Gun Laying Drive gives an Initiative boost during the shooting phase, potentially allowing the Maus to shoot before opponents and therefore reducing the chance of taking unnecessary damage. Stepping up to Binocular Telescope, this pairs with the Big Gun rule and allows you to Modify an additional Hit to a Crit when shooting at Tanks not at Close Range, which can go a long way to reducing the combat effectiveness of enemy Tanks with the potential to do extra damage. Finally, Camouflage Net gives you a flat +1 Survivability while Stationary, which will all but ensure that you are rolling all 6 Defense dice when you inevitably receive incoming fire.
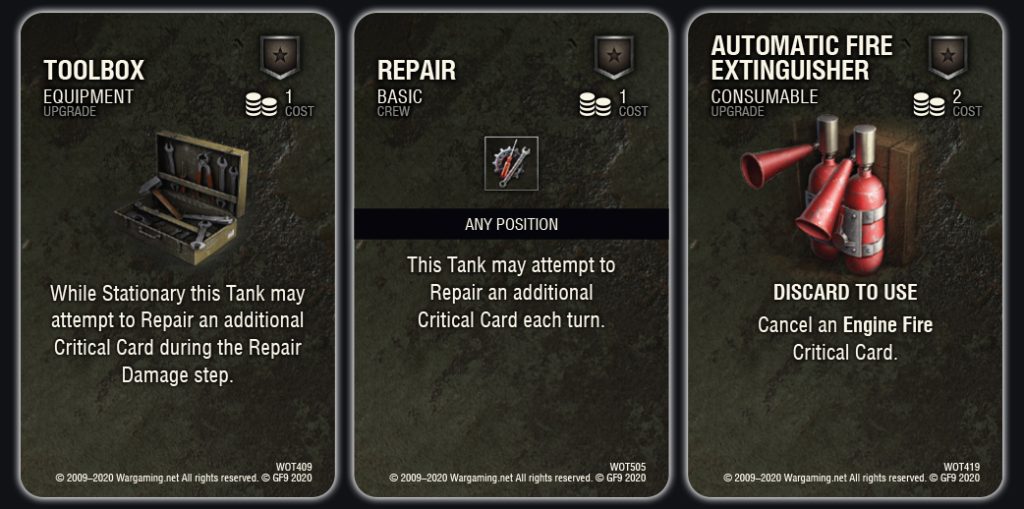
Regardless of the upgrades attached to a Tank, receiving Critical Damage is a surefire way to severely reduce the damage output you’re capable of. No matter how much Firepower a Tank has, it’s worthless if the crew have all bailed out, or the turret is jammed facing the wrong way! The Maus is no different, so having the ability to Repair Critical Cards is always a valuable option to consider. Equipping a Toolbox or adding a Repair crew member allows you to attempt to Repair an additional Critical Card every turn, which will be invaluable to stop Critical Cards stacking up. Additionally, Engine Fire is a potent Critical Card that can quickly remove Hit Points regardless of your Survivability if the Repair rolls don’t go your way. Equipping an Automatic Fire Extinguisher allows you to Cancel an Engine Fire Critical Card should one be drawn, removing this threat before it even takes hold.
You’ll have to be shrewd to fit these upgrades into your 200-point platoons, but making the Maus the heavy-lifter of your platoon will prove to be a true challenge for your opponents. Pairing an upgraded Maus with a pair of small Medium tanks (Panzer III J is a great option) gives you great flexibility to hunt down priority targets and focus fire while the Maus stands in a dominating position, impervious to incoming damage. Make use of your upgrades and craft the ultimate Heavy Tank!
Equipping the Centurion Mk. I
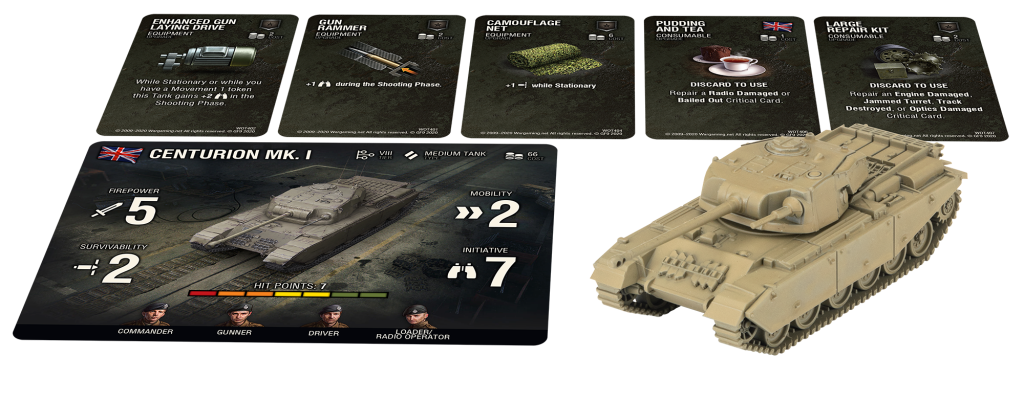
Nothing is more iconic in the British Medium tree than the Centurion and the Mk. I is where it all begins. A quintessential Medium Tank, the Centurion is a Jack of all Trades, offering you flexibility where you need it. At 66 points, the Centurion is a blank canvas, waiting to be upgraded into whatever role you need. With the 2023 Starter Set bringing a selection of some of the biggest and baddest Heavy Tanks to the table, we’ll look at how you can best set your Centurion Mk. I to be a mobile and versatile damage dealer, shooting first and asking questions later.
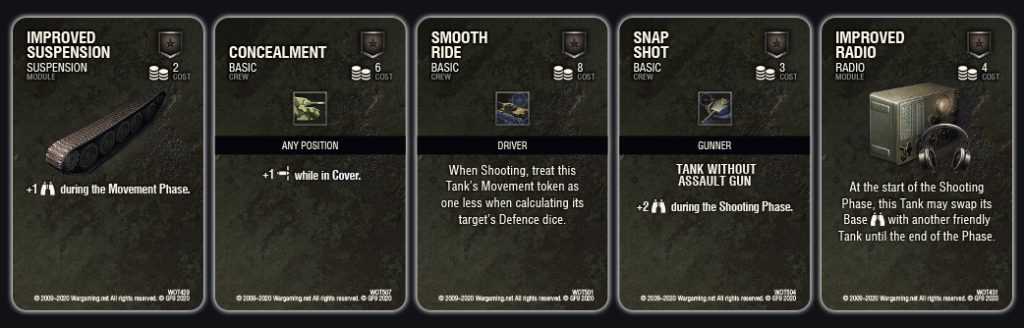
The keys to making Medium Tanks work is to keep them moving to increase their Defence dice pool, and to utilise the Medium Tank rule to increase the odds of damage being dealt. Having the higher Movement Initiative will be vital to ensure that you can react to the Heavy Tanks and relocate as necessary, so equipping upgrades such as Improved Suspension will go a long way to helping keep the Centurion one step ahead. This pairs well with a Crew member trained in Concealment, allowing you to manoeuvre your Tank into positions where it can both shoot and benefit from a +1 Survivability bonus from being in Cover. Use the terrain to your advantage here to make the most of the 7 Hit Points. Moving does increase the Defence pool of your opponent’s vehicles, and this is where Smooth Ride can be extremely valuable, reducing your Movement token by one when calculating your target’s Defence dice.
Even after all the manoeuvring and care taken to stay in Cover, if a round hits your Medium Tanks it’ll do damage and potentially reduce the effectiveness of your own Firepower. Shooting first is the easiest way to avoid this, and is well worth considering with the Centurion Mk. I. Taking Snap Shot will give you +2 Initiative in the Shooting Phase, taking you up to 9 Initiative, plenty enough to outgun Heavy Tanks. The alternative is to trade your 7 Initiative with another Tank in your platoon that might have even more Firepower and let it do the dirty work, which Improved Radio allows you to do.
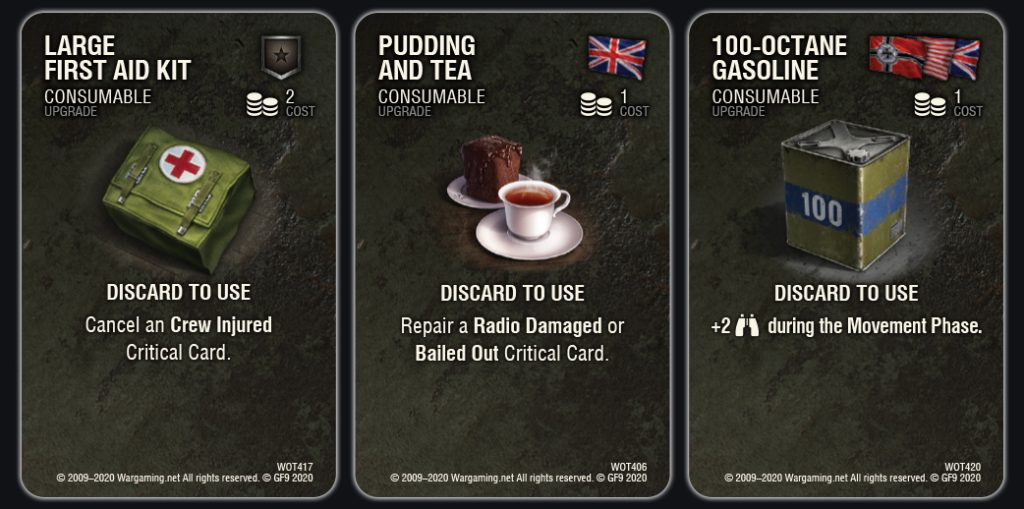
The Centurion works well with a range of Crew upgrades, and keeping those crew members alive is essential to ensure you retain all of their benefits. To avoid losing these perks to Crew Injured Critical Cards, consider taking a Large First Aid Kit, which will allow you to Cancel a Crew Injured card should you take Critical damage. Likewise, your crew is useless if they’re cowering under that tank, so spending a point on Pudding and Tea to ensure that you Repair a Radio Damaged or Bailed Out Critical Card is a worthwhile investment. Finally, should you come up against lighter, faster Tanks or face a tricked-out Heavy Tank, taking 100-Octane Gasoline is an invaluable way to make sure you can put your Centurion in the right place at the right time.
Even if fully tricking out the Centurion Mk. 1, you’ll still have plenty of points to spend on your platoon. This allows you to pair the Centurion with a multitude of options; run it alongside a Heavy Tank that can absorb damage while the Centurion works the flanks, run it with Medium Tanks and utilise focus firing to quickly whittle down targets, or mix it with a variety of tank types to truly augment the damage and leave your opponent guessing where the threat lies. The Centurion Mk. I is made for upgrades, so get experimenting and find the combination that works for you!
Join us next week where we discuss how you can equip your T29 and IS-3!
