
The Federation’s Starfleet have wide-ranging responsibilities. They are explorers and scientists, they deliver humanitarian aid, and they defend the United Federation of Planets against attack. Commander Riker, acting captain of the U.S.S. Enterprise, faces a challenging, not to mention daunting, task in the wake of the Battle of Wolf 359. He must discover a way to defeat the Borg before they add the Federation to their mindless Collective, then actually defeat them.
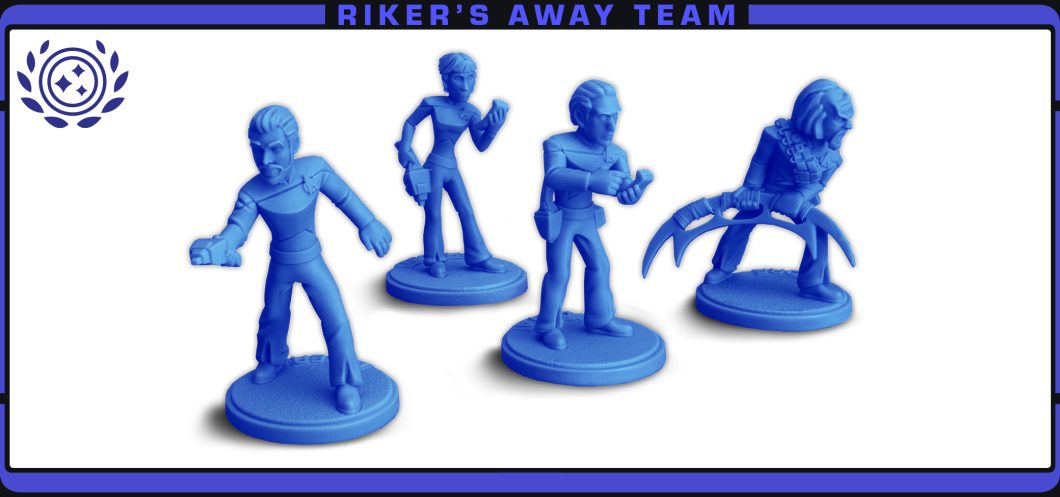
That gives RIKER’S AWAY TEAM two very different styles of play. You can attempt to repair the U.S.S. Ahwanee and learn more about the Borg, or you can defend Sector 001 (Earth to the uninitiated) and go to war against your opponent. To achieve this you have a small, elite team: Riker, Worf, his Klingon security officer, Data, his android science officer, and Shelby, a specialist in all things Borg.
Your basic approach is the repair ship option where you need to move around the various terminals on the ship and take skill tests. The repair ship missions, which get you more points and a 30-point bonus at the end of the game, often require you to have characters at two different places to complete.
You have no lack of skill. Data rolls three dice and the others two, just needing one roll of 4 or more. If that’s not enough, each character has specialisations that give them an extra die for tasks that match their training. On top of that, you can always discard cards to get re-rolls as well. Plus, many missions give extra points for extra successes, so all that talent won’t go to waste.
This makes positioning vital. Once you have everyone in place for a mission, it’s as good as done. However, spending time running all over the ship trying to get set up for the next mission can be a big time sink. Since every character only has six actions per game, every move action you make is a lost scoring opportunity.
More than any of the other away teams, the Beam Down step at the start of the game can make or break your fist turn. Position your team poorly, and you’ll lose half the first round getting into position. Know where your missions require you to be, and try to get the most important areas for your initial deployment. Then, place your characters on the most likely terminals in those areas. If your opponent lets you control the bridge and engineering at the start of the game, you’re ready for a great start to the game. Then, when you draw your initial hand of missions, use the Reverse Polarity rule to hunt for missions that you can do with a minimum of movement in the first round — ideally missions that require you to be at the terminals you beamed down to.
After that, it gets more of a balancing act, since you won’t have much control of where you need to be to score missions. Try to spread out so that someone is always close enough to get to the required terminal. For the missions that require characters at two terminals, you’ll need to order your activations carefully so that the secondary character is in place when a character activates to score the mission. It can be tricky, but once you get the hang of it, your crew can flow through the ship, scoring mission after mission.
Now, your opponent might have some objections to your plan, and might express them forcefully by attacking your characters. That’s when you bring out your secret weapon — your phasers. Unlike most weapons, your phasers stun an opponent rather than hurting them. This can seem like a letdown at first, until you realise that it only takes one hit from a phaser to stun someone, but lots of hits to neutralise them.
If a Klingon is storming down the main corridor intent on evicting you from the bridge, dropping them with a stun shot or two can totally ruin their plan. They’ll spend most or all of their next activation just getting back on their feet. If you just shot them, they’d take damage, but they’d still be coming and still wale on your characters or even neutralise them.
If you really want to bring on the hurt, you can Set Phasers to Kill, giving you the option of using your phasers as normal weapons. Since there are quite a few missions that give you points for successful combat, and the Protect Sector 001 gives you points for neutralising opponents, going to war can be a viable strategy. Not only will you rack up points, but you’ll reduce your opponent’s scoring ability in the process.
Riker’s away team is an elite team, with plenty of options, whether you favour confrontation or just getting on with the job.

Gowron’s Klingons love nothing better than an honourable fight, so you can expect them to come after your team, bat’leths swinging. There are two ways to deal with this. One is to simply avoid conflict and focus on scoring, while the other is to tackle them head on.
As the Klingons will usually want to get into hand-to-hand combat with your characters, movement and phasers are your key tools to keep them at bay. If you can manage your missions right, you might be able to flow from terminal to terminal, scoring missions and keeping ahead of the pursuing Klingons.
More likely though, you’ll need to designate one or two characters to keep the Klingons at bay while the rest of the team get to work. If you can find a bottleneck, Worf can sit there stunning Klingons until they finally reach him, then hold them off in hand-to-hand combat with his bat’leth, which gives him an extra defence die in melee. Clever tricks like Sprint, Site-to-Site Transport, and Riker’s Orders can quickly move him to the next bottleneck to repeat the process.
Diversion, Tactical Retreat, and Defusing the Situation can also be used to avoid combat. Eventually though, the Klingons will get to your characters. Now’s the time to discard cards to re-roll your defence dice to keep your characters alive. Even a badly injured character is still better than a neutralised one, since you have Hyposprays, Medical Attention, and Beverly Crusher to restore them back to health.
If you decide to tackle them head on, use your phasers (and the powerful Type 3 Phaser Rifle) to fight at range. Pick your spot to fight carefully so that there’s always a way out (turbo lifts are great for this), and back off rather than letting the Klingons get in close. Operate in pairs for the best effect, concentrating fire on one target until they fall, then switching to the next.
Gowron’s tough, but if you use your strengths and flow like water, the blade won’t harm you.
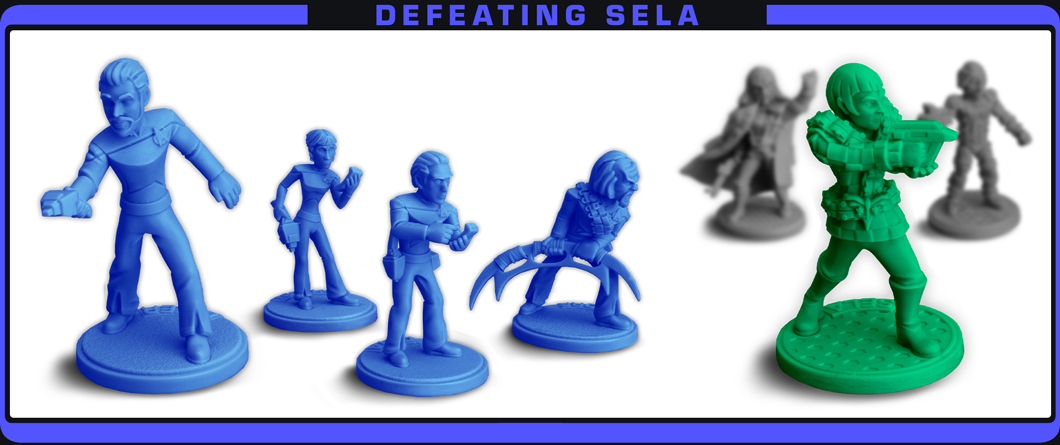
The Romulans are a challenge. Sela combines the best of her Romulan background with the worst of her human side. She’s cunning, devious, and dangerous. Against her, the most important thing is to keep scoring.
Like your away team, the Romulans are going to be performing skill tests at terminals to gather points, and their special bonus, intel. This can make the game a race as you each attempt to score faster than the other. At the start of the game, you’ll have the advantage, but you’ll need it. As the Romulans gather intel, they’ll start using it to interfere with your plans. Whether they attempt sabotage or outright assassination, their methods are sneaky and effective. Combined with their larger five-character team, they can start becoming a serious nuisance while still racking up points.
Sela does have two weaknesses though. The first is that many of her mission skill tests can be challenged by your characters if they are at terminals. This allows you to combine scoring opportunities with counter-hacking to slow the Romulans down. Data is especially good at this, being the equal of any Romulan. Try to end your activations at a terminal to take advantage of this weakness.
The other weakness is that Romulans aren’t very tough. One-on-one, barring sneaky tricks, Worf or Data can easily defeat them in hand-to-hand combat, and even Shelby is more than a match for them in a gunfight. Consider taking the opportunity to neutralise any lone Romulans that stray too close to your team. Watch out though, they are sneaky and may duck out of sight before you manage to hit them,
Sela is a challenge precisely because her away team is the closest to yours. It’s about scoring at terminals, with a side helping of combat. But it’s a mirror image, with nasty violence and dirty tricks replacing your phasers’ stun setting.
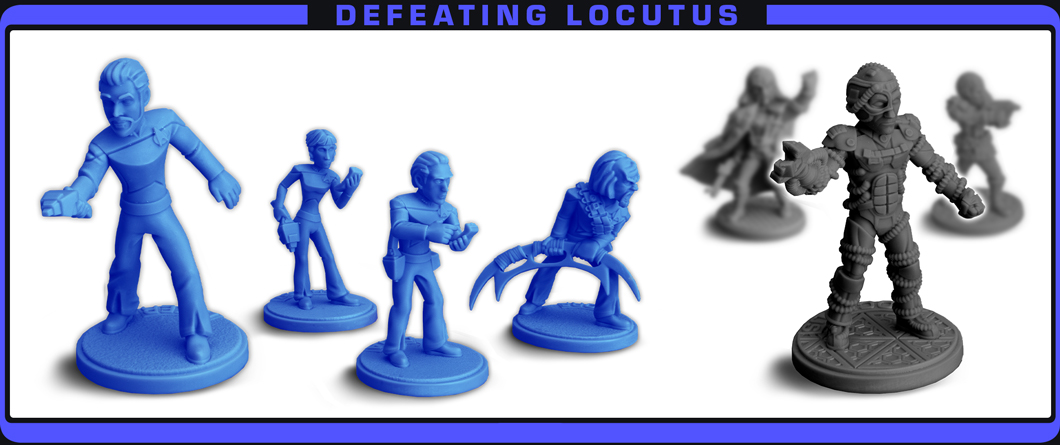
Locutus can be a challenge, but is often best handled by simply leaving their away team alone. If left to your own devices, you can rack up a good score quite quickly, especially if the Borg stay out of your way.
The problems come if the Borg start getting in your way, either by occupying terminals you need or by simply blocking the route you want to take. It’s easy enough to dispatch a Borg drone, no stunning here, it’s shoot to kill all the way against Borg. However, they have a nasty habit of simply replacing the drone with another and continuing as if nothing happened. Worse, if you get too close, they can unexpectedly transform from quiet assimilation machines into deadly assimilation machines, adding your characters to the Collective.
The way new characters appear wherever they need to be at the start of each round adds to the challenge. There’s always the risk that a Borg drone will beam down to a very inconvenient place, with all the risks mentioned above.
Meanwhile, the Borg will be working away at their own schemes, racking up points themselves. You need to keep an eye on this as once they start getting ahead of you, they’ll just keep going as their numbers increase.
The easy way to handle this is a combination of flexibility, avoiding areas staked out by the Borg, and targeted violence. Try to stay away from Borg drones, taking other routes or picking other missions rather than risking getting assimilated. If you do need to remove a Borg, stay well back and use plenty of firepower. They aren’t too hard to neutralise, but they have a habit of coming straight back, so you might need to decommission a drone several times before they stop what they’re doing and get out of the way.
When facing Locutus, don’t get complacent. You can win with a bit of care, but you can quickly find the tables turned and your whole crew assimilated.
BEAM DOWN AND PUT YOUR NEWLY ACQUIRED KNOWLEDGE TO THE TEST!
