
Applying Your Decals
If you’ve got a decal set, you’ll have some waterslide decals you can use to customise your tank. Whether that’s some custom insignia or proof of your battle prowess, let’s have a look at how we can apply decals to our tanks!
To start, you’ll need;
- A shallow container of warm water
- A chisel-shaped brush (size 2 or 3)
- Paper towels
- A pair of scissors or a hobby knife
- A surface to cut on.
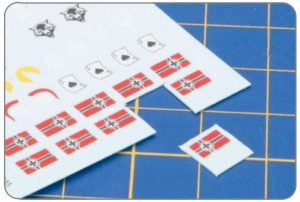
First, carefully cut out the decals you want for your tank. You can try to trim them closely, but they do come with precut over-gloss, so you don’t need to be perfectly precise.
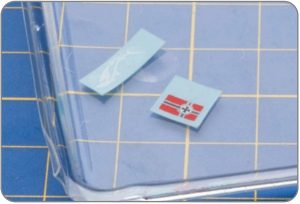
Next, put the decal you’re planning to add to your tank in some warm water (I used one of our tank blisters as a water tray). If you were to toss the whole sheet in the water the decals would all float off as individual pieces (I wouldn’t recommend this!).
After about 20 seconds the decal will start to slide away from the backing paper.
 Use your brush to separate the decal from the paper. Then use the brush to pick the decal from the water, make sure the decal is face-up on the brush. Sometimes the decal will try and wrap around the brush, it can be flattened by brushing along a flat surface.
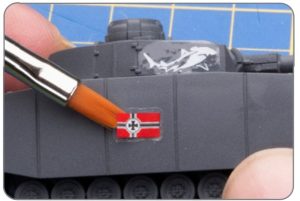
Use the brush to float the decal onto the tank surface, once the decal is floating in a small pool of water the brush can be slid from under it.
While the decal is floating use the brush to adjust its position by sliding it around.
If it becomes too dry to move add some more water with the brush.
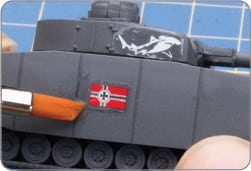
Once in position, dry the brush on a paper towel or similar, then use it to soak up the excess water on and around the decal. The decal can be flattened out during this process as well.
Once you’re happy with the position of the decal and you’ve removed the excess water leave it to dry. If the surface your decal has been placed on isn’t completely flat, you can use decal softener to make it fit to the ridges etc. Giving your decal that painted on look.
After you have completed the whole tank, and the decals have dried, you can apply a thin layer of matt varnish all over to protect the paint and decals from the harshness of battle.
Complete, Voila!
Decals are easy to use; so don’t be afraid to give them a go! You can practice using one of the divisional markings you don’t intend to use on a piece of painted card or an old model. If you want to try a more advanced (but still straightforward!) method of applying decals that we use here in the office, you can watch the video below!
For more decals you can check out the full range in our store today!
